
Herring + Bones + Floor = Increased Value!
- Jun 28, 2023
- 3 min read
Easy hack to increase the value of your house AND make it a beautiful environment to live in. With the housing market, the way it is at the moment, it is natural to explore ways in which you can add value and appeal to your home. Introducing The herringbone floor...

...born from tradition and lovingly crafted by skilled hands, the Herringbone is more than just a surface to walk upon, it is an investment. Its enduring popularity ensures that should the homeowners ever decide to part ways with their beloved abode, the herringbone floor would stand as a prized asset, adding value to their home and enchanting the hearts of future admirers.
'HouseWow' a leading property and house styling professionals state that a recent study concluded that Herringbone flooring can have a positive impact on your house value.
In this fascinating blog post, we explore the benefits of Herringbone flooring, and take a close look at a recent job where we go through the steps of installing a traditional Herringbone floor, enjoy...
The Benefits of the Timeless Beauty of a Herringbone Floor
Beyond its intricate installation process, a herringbone floor offers numerous benefits that make it an excellent choice for homeowners seeking both style and functionality. Let's explore some of these advantages:
The herringbone pattern exudes timeless elegance and sophistication. Its geometric arrangement creates a visually striking effect, making it a focal point in any space, whether contemporary or traditional. Herringbone flooring effortlessly complements various architectural styles and interior design choices. Its adaptability allows it to harmonize with your evolving decor preferences over time.


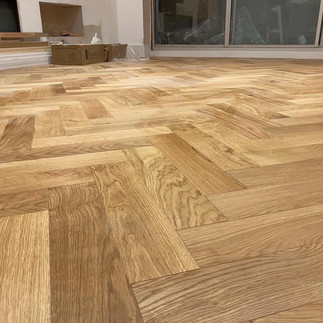
The angled arrangement of the herringbone pattern can create an optical illusion of expanded space. This is particularly advantageous for smaller rooms or areas with lower ceilings, as it lends an air of openness and grandeur.
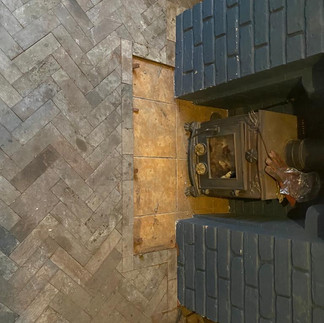
When crafted from high-quality materials and installed with precision, a herringbone floor is built to withstand heavy foot traffic and everyday use. Its durability ensures that it remains a stunning feature of your home for years to come (see more of this project here).
Find out what others have had to say about working with IJB Carpentry by clicking HERE (blog post continued below...)


Herringbone floors are relatively easy to maintain. Regular sweeping or vacuuming, along with occasional gentle mopping, is typically sufficient to keep them looking pristine. This ease of maintenance allows you to enjoy the beauty of your floor with minimal effort.
Timeless Investment Investing in a herringbone floor adds value to your home. Its enduring popularity ensures that it will continue to be an attractive feature should you decide to sell your property in the future.
Meticulous Artistry - Laying a Herringbone Floor
The installation of a herringbone floor involves meticulous attention to detail and precise craftsmanship.
Let's walk through the step-by-step process:

Step 1: Preparation Begin by ensuring the subfloor is clean, level, and structurally sound. Proper preparation is crucial to create a solid foundation for your herringbone floor.
Step 2: Subfloor Reinforcement (if necessary) If the existing subfloor requires reinforcement, take the necessary steps to enhance its stability and durability. This ensures a long-lasting herringbone floor.
Step 3: Measurement and Planning Accurate measurements are essential for a flawless herringbone installation. Calculate the angles and determine the optimal placement of the first row to achieve a visually appealing pattern.
Step 4: Marking and Cutting Achieving seamless transitions between individual wood pieces is vital for a polished herringbone floor. Precisely mark and cut each plank at the appropriate angles to create the characteristic herringbone effect.
Step 5: Layout and Installation Begin installing the herringbone pattern from the center of the room. Lay the first row carefully, ensuring it is perfectly straight. As you progress, interlock the planks, row by row, to form the stunning herringbone design. Pay close attention to detail to maintain the desired aesthetic.


Step 6: Sanding and Finishing Once the installation is complete, proceed to sand and finish the floor to bring out the natural beauty of the wood and protect it from daily wear and tear. This final touch enhances the allure of your herringbone floor.
A herringbone floor is a masterpiece that combines the allure of tradition with enduring
I loved completing this Herringbone floor.


If you are considering some new flooring options for your home, give me a bell or navigate to the contact us part of the website. Find out what others have to say about working with us here, and we can see what adventure awaits you.
Enjoyed this blog? why not read another or share with a friend?


Comments